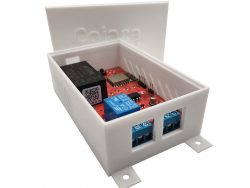
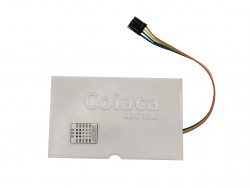
Upgrade your heating system for optimal performance and comfort with advanced temperature control.
Introduction
Are you struggling to maximize the efficiency of your heating system? Do you want precise control over your boiler’s output power to ensure comfort while minimizing energy consumption? Look no further! In this tutorial, we’ll show you how to revolutionize your heating setup using the Coiaca Wifi ABC board and temperature sensors, to transform your boiler into a smart one. Bid farewell to outdated thermostat controls and embrace a smarter, more efficient heating solution.
Why Upgrade?
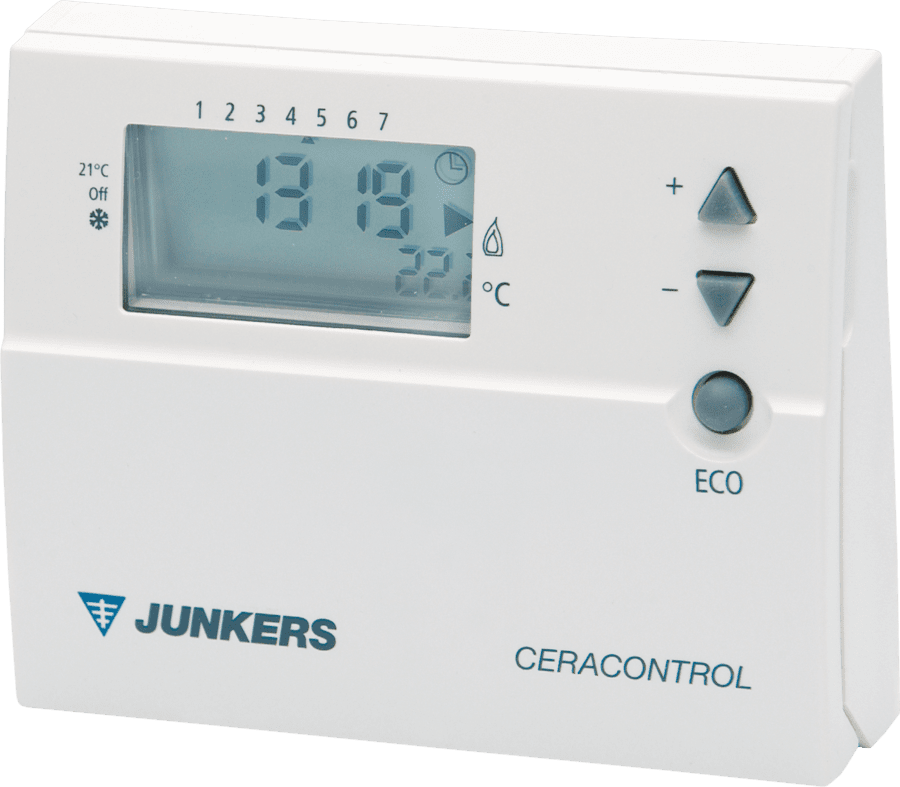
Many heating boilers today operate on the OpenTherm protocol, but what about those slightly older yet still efficient devices that can’t be controlled this way? For brands like Junkers, their equipment often requires specific thermostats for optimal efficiency. Traditional on/off thermostats just won’t cut it anymore when it comes to energy consumption and comfort.
Let’s see what can be done.
The Coiaca Wifi ABC Board
The Coiaca Wifi ABC board offers a game-changing solution. By integrating it into your heating system and connecting it to your preferred home automation system via MQTT, you gain precise control over your boiler’s output power. No more guesswork or inefficiencies—just tailor-made comfort and energy savings.
If you’re currently using thermostats like Bosch/Junkers TR-21, TR-220, TR-12, TR-200, TR 100, or similar models, you can seamlessly replace them with this Coiaca board. This integration allows you to connect your boiler with your home automation setup, unlocking a new level of control and convenience.
The wiring
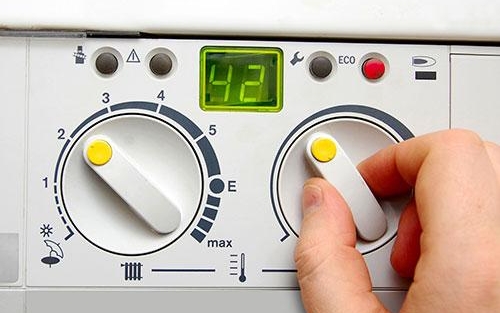
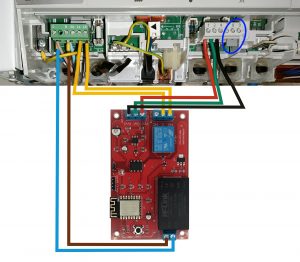
Connecting the Coiaca ABC board to your boiler is straightforward. Below, we illustrate the process using a Junker Euromaxx boiler, which can be adapted for similar models. Remember to always consult your boiler’s user manual to compare and connect accordngly.
1 – Switch off the boiler.
2 – Disconnect the boiler from the main power supply.
3 – Remove the old thermostat, if any.
4 – Using seven wires, establish the following connections:

- The NC terminal on the board to the LR terminal on the boiler.
- The C terminal on the board to the Ls terminal on the boiler.
- The Vcc terminal on the board to the 1 terminal on the boiler.
- The Out terminal on the board to the 2 terminal on the boiler.
- The Gnd terminal on the board to the 4 terminal on the boiler.
- One of the P3 AC input connector on the board to the L terminal on the boiler.
- The other of the P3 AC input connector on the board to the N terminal on the boiler.
- For this Junkers Euromaxx model, when connecting an ambient thermostat, terminals 8 and 9 (highlighted by the blue circle in the image) should be jumpered. Conversely, when using a simple on-off thermostat, these terminals should remain unjumpered.
(click to enlarge)
5 – Reconnect the boiler to the mains and power it on.
Now, the board will boot up, allowing you configure it.
The Formula
Let’s delve into the technical details. The formula we’ll be using takes into account factors like actual temperature, target temperature, modulation bandwidth, and temperature offset to calculate the optimal output power for your boiler. This ensures that your heating system operates at peak efficiency while maintaining your desired comfort level.
T: Actual temperature.
tT: Target temperature.
MaxP: Maximum power.
MinP: Minimum power.
TOS: Temperature offset.
MB: Modulation bandwidth
AC: Adjustment coefficient.
Formula: ((-MaxP/(2*MB))(T-(tT+TOS-MB))+MaxP)*AC
This formula calculates the optimal output power for your boiler based on the actual and target temperatures, as well as other parameters. Here’s how it works:
The formula considers the gap between the target and actual temperatures.
The Modulation Bandwidth defines the range within the boiler’s power output will vary from 100% to 0%. if target temperature is set to 22°C and this value is 2, while actual temperaure is below 20°C power will be 100%.
The Temperature Offset ensures that the boiler operates efficiently around the target temperature. This value is to control the hysteresis, which is the difference between the temperature that has been set on the thermostat as a setpoint, compared to the temperature at which the boiler starts. This avoids turning the boiler on and off in the event of a slight difference, turning it on when the temperature falls to the desired temperature minus the offset.
For instance, if this parameter is set on one degree and target temperature has been set at 21°C, the boiler will turn on if the actual temperature drops below 20°C.
The Adjustment Coefficient is a multiplier for fine-tuning the calculation for precise control. Since the energy to generate the signal is obtained from the boiler itself, it may not be linear and may vary between different models or be affected by wear and tear on the boiler over time. 1 means no adjustment.
Example
Let’s say:
Actual temperature (T) = 20°C
Target temperature (tT) = 22°C
MaxP = 100%
MinP = 30%
TOS = -1.25
MB = 2
AC = 1
Then, plugging these values into the formula: ((-100/(2*2))(20-(22+-1.25-2))+100)*1 = 68.75%
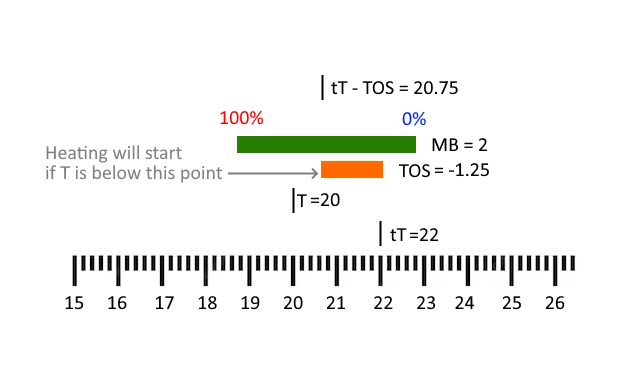
So, in this scenario, the optimal output power for the boiler would be 68.75%.
While T is below 18.75°C (T+TOS-MB) power will be 100%.
White T is between 18.75°C (T+TOS-MB) and 22.75°C (T+MB) power will vary between 100% and 0%.
If T drops, boiler won’t start until T is below 20.75°C (T-TOS).
Programming Your Automation
With the Coiaca ABC board and its Tasmota firmware, programming your automation becomes a breeze. Simply set up your home automation system to publish MQTT messages with the calculation results to the Coiaca ABC board. Whether you want to power on the boiler, adjust the burner power, or even implement more sophisticated automations, the possibilities are endless.
Example Automation
Let’s say you want to adjust the burner power according to the example calculation result or if the calculation falls below 30%—you might want to power down the boiler to conserve energy. With the Coiaca Wifi ABC board, you’re in full control of your heating system’s behavior.
The following are examples of MQTT messages payloads in JSON format:
To adjust the burner power according to the calculation result:
– Msg 1 to power on the boiler: {"POWER1":"ON"}
– Msg 2 to set the burner power: {"POWER2":"ON","Dimmer":68.75}
Running the automation every one minute to recalculate and publish Msg 2 will keep the burner power on the optimum level.
To power down the boiler if the calculation falls below 30%, an automation can be configured to publish the following messages when calculation result drops below 30%:
– Msg 1 to power off the boiler: {"POWER1":"OFF"}
– Msg 2 to stop sending: thermostat signal: {"POWER2":"OFF"}
Conclusion
You can upgrade your heating system today with the Coiaca Wifi ABC board.
Say goodbye to outdated thermostats and hello to a smarter, more efficient way of heating your home, all without the need to replace your boiler with an expensive new one. Experience the perfect blend of comfort and energy savings like never before. Don’t let inefficiency hold you back—embrace the future of heating technology now!


