
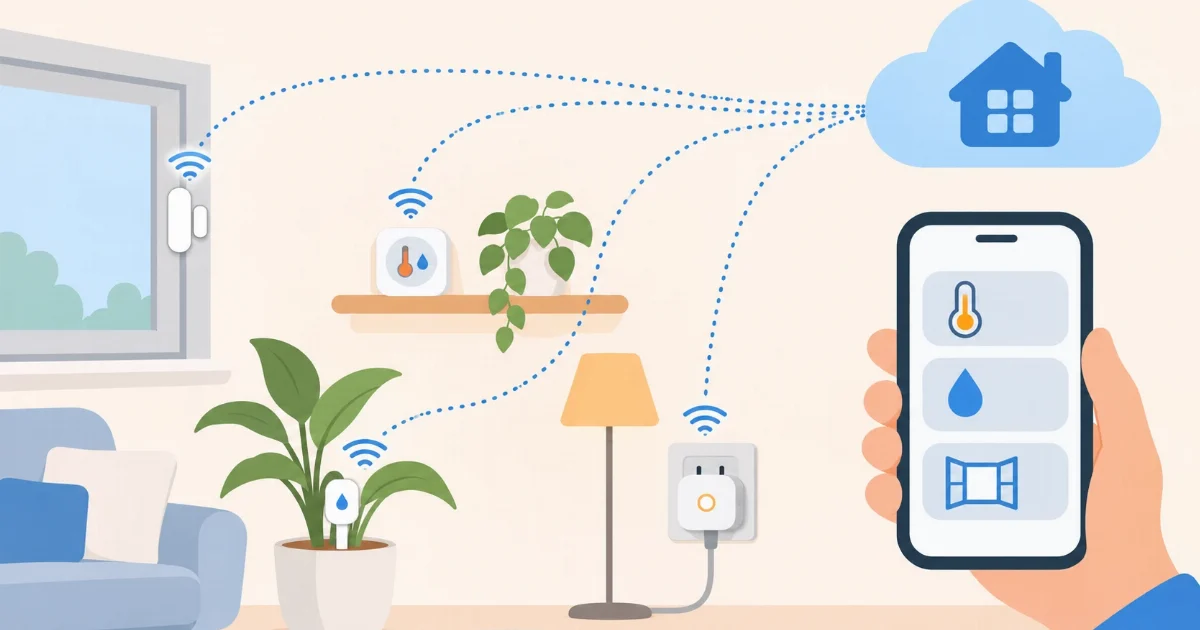

A temperature sensor in the bedroom, one on the window, a plug that measures what the washing machine uses… Wi-Fi sensors are the simplest way to start: they connect to the router you already have, with no coordinator or hub, and they work with Home Assistant in the cloud. Here is which ones to look at, how they reach your instance and what to do with them.
Two paths to the cloud
Since your Home Assistant is not on your network, the sensor has to reach it over the internet. There are two ways, and almost every cheap Wi-Fi sensor uses one or the other:
- Through the manufacturer’s cloud. That’s the case of Tuya sensors, sold under countless brands and set up with the Smart Life app. The sensor talks to Tuya’s cloud and Home Assistant reads from there with its official integration. It’s the cheapest option and the easiest to find.
- Straight to your Home Assistant, over MQTT. That’s the case of devices running Tasmota or ESPHome, two open firmwares. The sensor connects by itself to your instance’s MQTT broker, without going through anyone’s cloud. It’s the fastest option and gives you the most control.
Battery or plug: the difference that matters
Wi-Fi uses a lot of battery. That’s why battery-powered Wi-Fi sensors spend most of their time asleep and only wake up when something happens (a door opens, a drop of water) or every so often to send the temperature. They work well, but they take a few seconds to report and the temperature arrives every few minutes, not instantly.
Plugged-in ones (plugs with metering, thermometers with a power supply) are always connected and report right away. If a sensor has to react fast and there’s a socket nearby, pick one with power.
The five that pay off most
Temperature and humidity
The first one to buy. One per room tells you where it’s cold, when to air the bathroom or whether the bedroom is too dry. Those with a display double as an ordinary thermometer.
Door and window
A magnet and a contact: they know whether it’s open or closed. Use them to turn the heating off when you open the window, or to get an alert if the front door was left open.
Water leak
It sits on the floor, under the washing machine, the dishwasher or the water heater. If it gets wet, you get an alert on your phone. Since it only has to wake up when something happens, the battery Wi-Fi version works very well.
Soil moisture
It goes into the pot and measures how much water is left. It tells you when the plant needs watering, and with a valve or a plug with a pump, watering can be automatic.
Plug with energy metering
It doesn’t look like a sensor, but it’s one of the most useful: it knows how much energy goes through it. With that, Home Assistant knows when the washing machine finished, how much the water heater uses or whether someone left the iron on. It also switches whatever is plugged into it.
Path 1: Tuya and Smart Life sensors
If the sensor is set up with the Smart Life or Tuya Smart app, it already works with your Home Assistant in the cloud: add it in the app, then add it to Home Assistant with the Tuya integration by scanning a QR code. We explain it step by step in how to connect Tuya and Smart Life.
What you should know: it depends on Tuya’s cloud. If Tuya has an outage or stops serving that model, the sensor stops reaching you. For a thermometer or a window alert that’s a small risk; for something critical, go with path 2.
Path 2: Tasmota or ESPHome over MQTT
There are plugs, thermometers and boards that come with Tasmota or ESPHome preinstalled (search for them by the firmware name), and many others you can install it on. They don’t depend on any cloud: they talk straight to your Home Assistant.
With Tasmota, open the device’s web page (its IP on your network), go to Configuration → MQTT and enter your instance’s broker details: server, port, user and password. If that page shows a TLS checkbox (it does on the builds for ESP32 boards), tick it and use the encrypted port. If it doesn’t, which is usual on ESP8266 boards, the device can’t encrypt the connection: in that case use the unencrypted port your service provides, if it has one. Home Assistant’s Tasmota integration then discovers it by itself, with all its entities.
With ESPHome, the device uses its own connection to Home Assistant by default, which only works inside your network. For the cloud you switch it to MQTT in its configuration (the mqtt component instead of api) and Home Assistant discovers it just the same. It’s a path for people already comfortable with ESPHome.
Shelly devices also speak MQTT, but Home Assistant doesn’t discover them by themselves that way and you have to create their entities by hand. To start, Tasmota or a Tuya sensor is easier.
Before buying, check
- That it’s really Wi-Fi. Many cheap sensors are Zigbee or Bluetooth and need the brand’s hub or gateway. The box or listing has to say Wi-Fi, not “requires gateway” or “requires hub”.
- What it’s set up with. If it’s the Smart Life or Tuya Smart app, it goes through path 1. If it says Tasmota or ESPHome, path 2. If it only works with the brand’s own app, first check that Home Assistant has an integration for it.
- That your Wi-Fi reaches where the sensor goes. Almost all of them use the 2.4 GHz band, which reaches further than 5 GHz. If your router splits the two networks, connect them to the 2.4 GHz one.
Four automations to start with
- The washing machine is done. Trigger: the plug’s power has been below 5 W for three minutes. Condition: it was above that before. Action: a phone notification, “the laundry is ready”.
- Water leak. Trigger: the sensor turns “wet”. Action: a notification to everyone at home and, if you have a shut-off valve on a plug, close it.
- The plant is thirsty. Trigger: soil moisture drops below 20%. Action: an alert, or turn the watering pump on for five minutes.
- Window open, heating off. Trigger: the window has been open for a minute. Action: turn that room’s radiator off and back on when it closes. In 5 Home Assistant helpers we show how to do it even without a window sensor.
And if one day you have lots of battery sensors? That’s where Zigbee sensors last longer on each battery, in exchange for adding a coordinator. To start, Wi-Fi is the most direct route.
With Coiaca Cloud HA
Coiaca Cloud HA gives you the official, unmodified Home Assistant in your own private instance in the cloud. Both paths work from day one:
- The Tuya integration is added like in any Home Assistant.
- Your instance comes with its own MQTT broker with TLS, and the MQTT integration is already set up. The details Tasmota asks for (server
mqtt.YOUR-ID.coiaca.app, port8883, user and password) are shown in the Coiaca panel of your Home Assistant. - For devices that can’t encrypt, like Tasmota on ESP8266, you turn on the unencrypted MQTT port in the panel. It’s off by default and uses a separate user, just for those devices.
We explain it step by step in the getting started guide. With the 30-day free trial you can connect your first sensors and set up your alerts before the first payment. If it’s not for you, cancel before day 31.
Try Coiaca Cloud HA free for 30 days
Sources
- Home Assistant: Tuya integration
- Home Assistant: Tasmota integration
- Tasmota: MQTT
- ESPHome: MQTT client
- Home Assistant: MQTT
Coiaca is not affiliated with the Open Home Foundation, Nabu Casa, Tuya, Tasmota, ESPHome, Shelly or the manufacturers mentioned. Trademarks belong to their owners.